Previous: On Timely Feedback During Test Taking
Installing CUDA on Linux the Right Way (in Ubuntu < 19.04)
Published: Sat, 15 Dec 2018 00:00:00 GMT by David M. ChanSo, you've got a shiny new computer, or a shiny new graphics card, and you want to install CUDA. Not only this, but you're not going to play video games with your graphics card. Maybe you want to try some of this new "Deep Learning" hype. Maybe you just want to make your code a little bit faster (There's easier ways... try the -O3 compiler command). Regardless of the reason, you need to install CUDA on your machine.
For some reason, everyone that I talk to really struggles with this installation process. The reason for this is that it's not easy. It's not easy at all. Most people install CUDA with apt (and then it breaks their whole computer when they want the next version) or they try downloading the CUDA package file, and get a cryptic error about "X-Windows." In this tutorial, I'm going to walk you through the right way to download and install CUDA on your Linux box, in a way that's not so scary, and will actually make sense later when you want to go upgrade to the next version. So let's begin!
1. Read the Tutorial
Most people fail this step. They think to themselves that they really just need to skip ahead to the commands. They're not wrong. You can probably do everything in this tutorial without reading it. But it won't make you happy. I promise.
2. Installing the NVIDIA drivers
There is one prerequisite step to installing CUDA, and that's making sure that you have the latest NVIDIA drivers. This is actually a separate step to the CUDA installation that we're going to do below, since it's useful to know how to install the drivers on your own. Not only this, but installing the drivers is one of the more challenging things that you have to do.
Note: As of Ubuntu version 19.04, it is no longer necessary to obtain the CUDA drivers. They should already be pre-installed. If you need to update the drivers, you should do so by using your package manager.
The first thing to do is obtain the right Runfile for your GPU and Linux version. Go here: https://www.nvidia.com/Download/index.aspx?lang=en-us and use the manual search to select your GPU version, and the Linux version that you're using (Usually the system box is Linux 64-bit, unless you have something special, and if you have something that special, you're probably not in need of this tutorial).
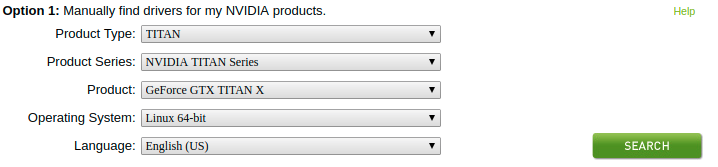 Clicking on "Start Search" will give us the driver download link:
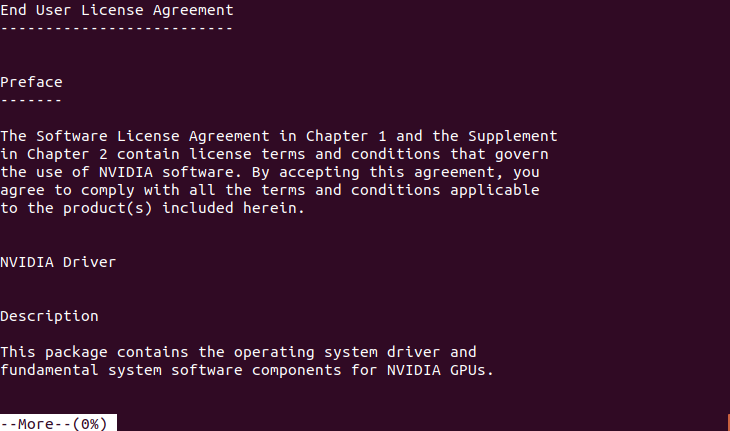
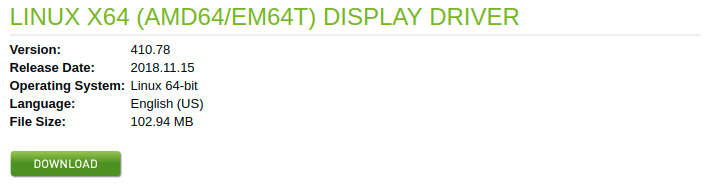 Agree to the TOS, and download. Or don't agree to the TOS, and give up.
 This will download a file, appropriately named
 NVIDA-Linux-<system>-<version>.run. This file is the one that you're going to use. If you're installing on a remote machine, or don't have direct access. Right click on the Download button, and copy the link. You can then use wget:
wget <copied link>
to get the file on the remote machine.
Now that we have the file we need, we need to install the drivers. Open up a terminal (Ctrl+Alt+T on Ubuntu), and navigate to your downloads folder. If you don't know how to use the terminal, I suggest a crash course: https://www.howtogeek.com/140679/beginner-geek-how-to-start-using-the-linux-terminal/
Running chmod +x NVIDA-Linux-<system>-<version>.run replacing the 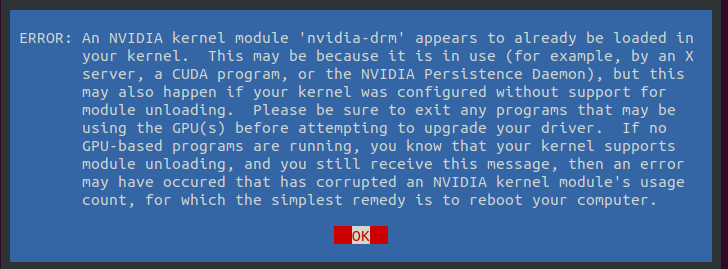 Most people give up here, and try to google a tutorial. But if we read these errors, they're actually pretty insightful. This one says that I'm already using my NVIDIA driver, and that it has to not be in use before we can upgrade it.
To deal with these issues, we're going to have to do something a little bit unique. It's at this point that you want to open this tutorial up on your phone, or another mobile device. We're going to be working in a TTY session for the remainder of this install, which means that you won't have access to your internet browser. The reason that we have to enter a TTY session is that we're going to have to kill the X-server which runs the GUI. This means that we can't be using any of the fancy graphical features of the OS.
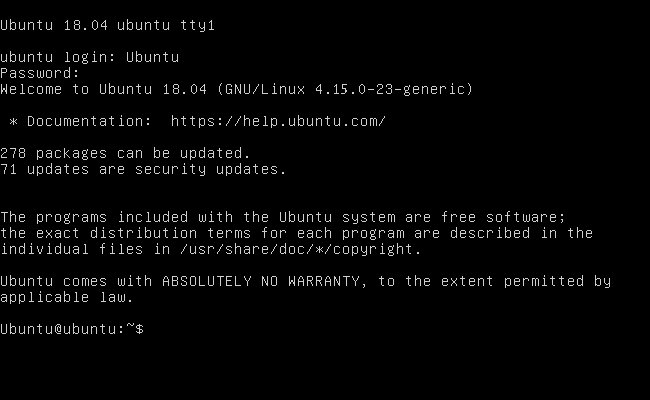
Now that you're on mobile - reboot your computer. When you get to the login screen, if you're on Ubuntu 17.10 or newer, you want to enter a TTY session by pressing Ctrl+Alt+F3. If you're on an older version of Ubuntu, you can use Ctrl+Alt+F1. If you're on RHEL, you're going to want Ctrl+Alt+F2. If you're on Centos, it's another F-key. Basically, all of the F-keys map to TTY sessions (you can read about them more here: https://askubuntu.com/questions/66195/what-is-a-tty-and-how-do-i-access-a-tty). You'll know you've entered the TTY session when your screen goes dark, and you're greeted by a login prompt. You can login here. On Ubuntu, it looks like this:
 Now that we're in a TTY, it acts just like a terminal. The first thing that we're going to want to do is kill the X-server. In the newer versions of Ubuntu, this can be done by running
sudo service lightdm stop
If this doesn't work - it's possible that you have a different display manager. You can try killing GDM with:
sudo service gdm stop
Most modern distributions of Ubuntu use one of these two X-server managers. If neither of these commands works, then it's time to find which X-server/window manager your distribution is using and kill that. I won't go into how to do this, but I suspect that if you're not using Ubuntu, you have at least a bit of Google-Fu.
Now that we're here, we can change to the directory of the downloaded Runfile. We can then execute the file:
sudo ./NVIDIA-Linux-<system>-<version>.run
If you haven't killed your X-server properly, you're going to get the following error:
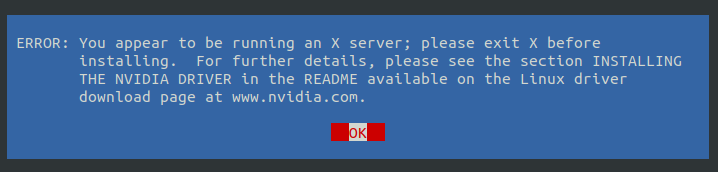 Make sure that you're in a TTY, and that you have killed the X-server which is running your GUI. I often get the following error:
 I've never actually had an issue with this - it's safe to continue the installation. If you have DKMS, you'll be gifted the following screen:
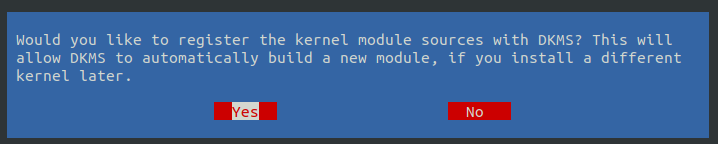 It's up to you, but I like to put "Yes" for this. This means that if I rebuild my kernel, I probably won't have to fix the NVIDIA drivers. The next window prompts:
I like saying yes... But if you're never going to use them, why bother? After pressing Yes or No here, the screen may freeze for a moment, but then it will enter the installation phase. This phase usually take a minute or two, and then you'll have a working install of the NVIDIA drivers. The next window is:
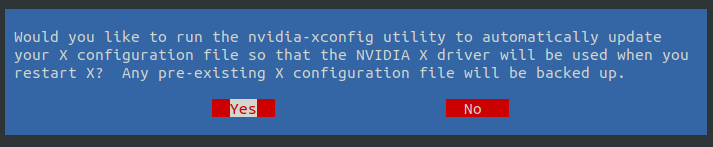 I put yes here. And you probably should as well. When you press "Yes", your system will now have brand new NVIDIA drivers. Reboot your machine, and everything should be set up properly!
A sometimes possible error (Login Loop)
Sometimes, when you install the NVIDIA drivers and restart your computer, you won't be able to login with the GUI. It will look like it's logging in, but it doesn't, and you get returned to the login screen. This is a problem with the X-Configuration, and it's relatively easy to fix. Just open a TTY session, and reinstall the NVIDIA drivers. This has always fixed it for me!
Validating your Driver Installation
You can validate that everything is set up properly by running nvidia-smi, which should, if the drivers are working, give you a screen similar to the following:
 The version is clearly specified, and your GPUs should show up. If your GPUs don't show up, then there's an issue with the GPU connecting to the program. If you get the warning "nvidia-smi not found", you can run the command:
modinfo nvidia
Which should give something similar to:
 If neither of these commands work, then the drivers have not installed correctly. Try reinstalling the drivers using the above steps. If it's still not working after that, it's time to get out the phone, and dial NVIDIA customer support at 1-(800) 797-6530.
2. Obtain the latest CUDA version
The first thing that we have to do is obtain the latest version of CUDA from *gasp *the internet***. **Shocking. I know. You're going to want to go here: https://developer.nvidia.com/cuda-downloads
**Note: (As of 6/14/2019) Tensorflow does not support the latest version of CUDA. You can get version 10.0, which is supported from here: **https://developer.nvidia.com/cuda-10.0-download-archive
Once you're on that page, you need to obtain the "runfile"for your distribution. On my computer, I fill out the form like so:
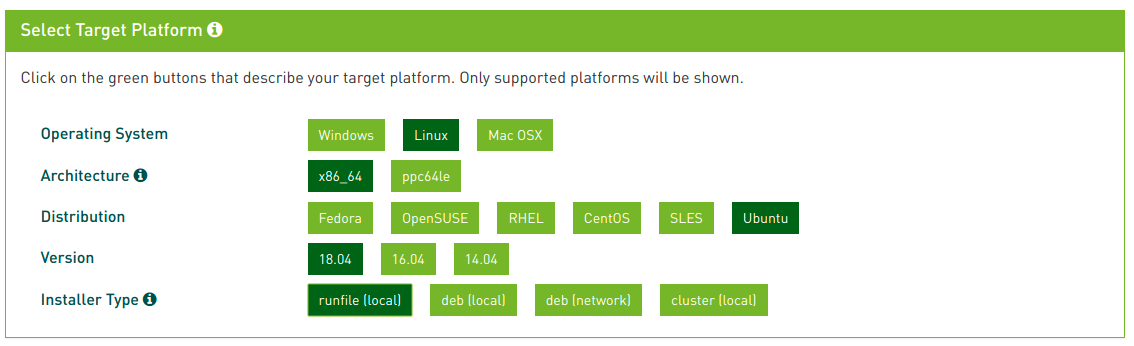 If you're using a different distribution, you want to follow the instructions for your distribution. There is always a "Runfile (local)" option, and that is the one that we want. It's always tempting to download the .deb files (if you're on Ubuntu), but this will always bring you pain. If you're on a non-LTS version of Ubuntu, your distribution may not show up here. That's ok. You want to pick the version which is closest to yours. For example, if you're on 17.10, the 18.04 version should work fine.
We then want to click the download link here:
 This will download the latest version of CUDA. If you're on a remote machine, you can once again right click the download link, and click "save link address". Then, it's as simple as using wget to download the file:
wget <copied link>
(In my case, this looked like: wget https://developer.nvidia.com/compute/cuda/10.0/Prod/local_installers/cuda_10.0.130_410.48_linux )
Now that we have the latest version of CUDA downloaded, open a normal terminal. This time, we don't have to bother with the TTY session, and we can just use a normal terminal. Change directory to the location where you've downloaded the Runfile, and run the command:
sudo sh <downloaded file> (Once again, to me it looked like: sudo sh cuda_10.0.130_410.48_linux.run)
If you get an error about "This file is not executable", all you have to do is run the command chmod +x <downloaded file> and that should fix the issues that you're having. At this point, it really is as simple as following the command-line prompts. The first screen you get is this:
 Scroll down using the Down Arrow / Space Key and accept the TOS by typing "accept" at the end and pressing enter:
 The next prompt asks us if we want to install the graphics driver. We've already done that, so it's the right choice to say "No":
 The next prompt asks if we want to install the CUDA toolkit. The answer is probably yes, if you've made it this far in the tutorial:
 Putting the CUDA toolkit in the default location is a good choice, just hit enter to continue past this prompt with the default (unless you really want to put it somewhere else, and you know what you're doing):
![Terminal prompt: 'Enter Toolkit Location [ default is /usr/local/cuda-10.0 ]:' left at the default.](/assets/images/2022/05/image-18.png) The next step is really cool (Oh, and you want to say yes):
The next step is really cool (Oh, and you want to say yes):
 Because it's possible to keep multiple versions of CUDA on your computer, you can have a "system" CUDA version by linking against /usr/local/cuda, and keeping that symbolic link up to date. When the next version of CUDA comes out, you can update the symbolic link, but keep the old version around for compatibility. I always say yes to this - it makes life easier in the future.
The next step is this:
 If you want to install the samples, go for it. I usually don't - but if it's your first time using CUDA, you might want them to start playing around with the toolkit.
Finishing this step will install the CUDA toolkit in the chosen directory. Often, you might get the following warning:
 Don't worry about this. We've already installed the driver, so we're good. **We're not quite done yet though! **To actually use the toolkit, we want to do two things:
- Add the new installation to your PATH. Open your ~/.bashrc file (or other system profile configuration file) and add the command:
export PATH=$PATH:/usr/local/cuda/bin
- Add the new installation to your LD_LIBRARY_PATH. Open your ~/.bashrc file again, and add:
export LD_LIBRARY_PATH=$LD_LIBRARY_PATH:/usr/local/cuda/lib64
Both of the above steps you'll only ever have to do once. The first allows you to run the CUDA binaries such as nvcc and nvidida-smi without the full path. The second, allows you to link against the CUDA runtime libraries. If you don't understand either of those previous sentences, that's ok.
Restart your computer, and you'll finally have a working installation of the CUDA libraries and NVIDIA drivers. Running
nvcc --version
Will validate your installation. If you get errors here, this means that there was a problem installing the drivers or the CUDA libraries. The error itself will be informative. Googling the error is probably the best way to go from here, because there's a lot of things that could happen, and there's a lot of smart people on the internet who have likely already solved the problem.
A (possible) issue:
Command 'nvcc' not found : This means that you haven't installed the CUDA toolkit right. The most likely issue is that you didn't export your PATH variable correctly. Make sure you do this, and then restart your computer (or run source ~/.bashrc). Also make sure that /usr/local/cuda/bin/nvcc exists. If it doesn't, this is a much deeper problem.
3. You're Done!
Congrats! You now have a brand new installation of CUDA and the associated NVIDIA drivers! You can compile CUDA code. You can run pip install tensorflow-gpu. You can do what you will with this newfound parallel computation power!
For some more resources on what to do with CUDA, check out NVIDIA's website:https://developer.nvidia.com/cuda-toolkit
3.5 [Bonus] Installing cuDNN
If you're like me, and you want to train deep neural networks with your GPU, you're going to need cuDNN, NVIDIA's DNN library. Luckily, it's much easier to install than the other counterparts.
You can download the installation here: https://developer.nvidia.com/cudnn. Unfortunately, you're going to have to register as an NVIDIA developer to download this software. Once you do that, you can download the software.
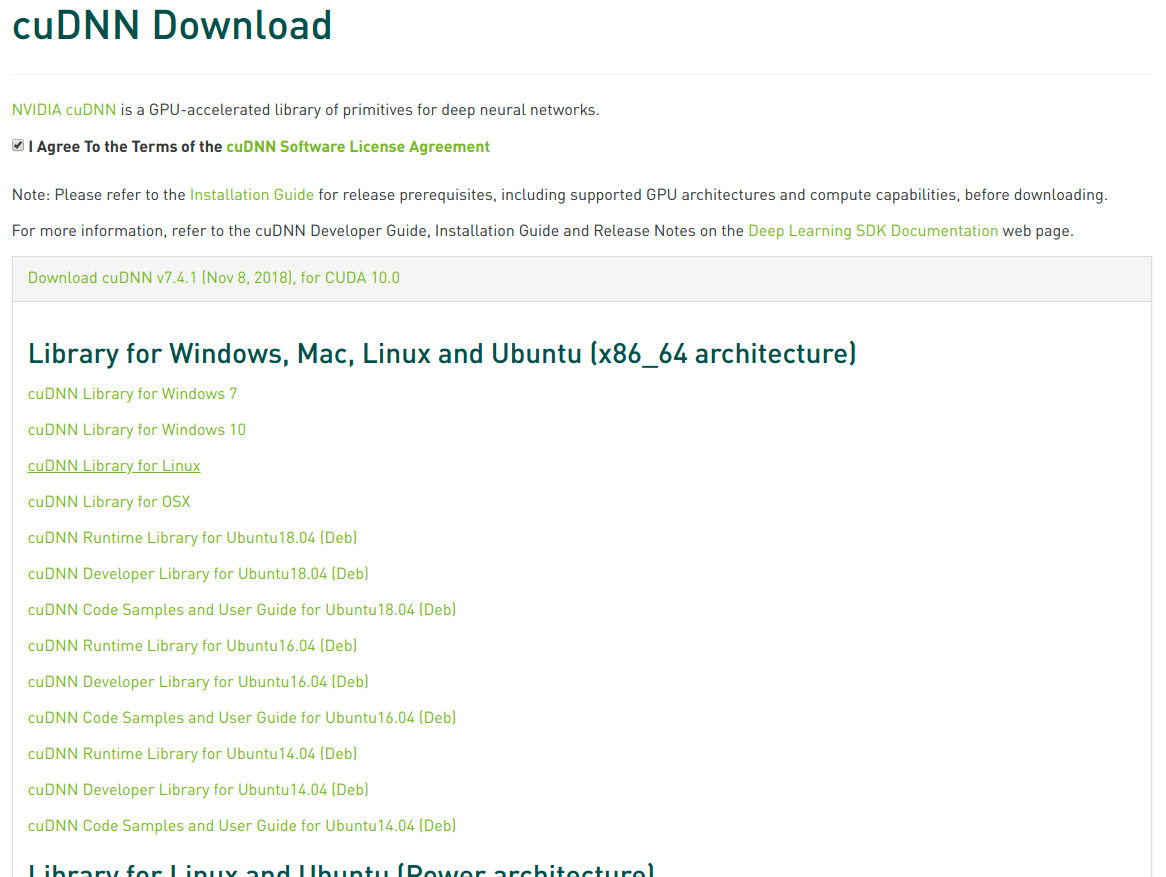 Make sure you get the cuDNN Library for Linux. Using the .deb files is, once again, a landmine of danger.
This will download a ".tgz" file: cudnn-<version>-linux.tgz. We can unzip this file using the command: tar -zxvf cudnn-<version>-linux.tgz. This will extract to a "cuda" folder:
 The CUDA folder mirrors the installation at
 /usr/local/cuda or wherever you installed CUDA in the previous section. Basically, we're just going to have to move all of the files from this folder to the right places in the CUDA directory:
 The following commands can do this:
sudo mv cuda/include/* /usr/local/cuda/include/
sudo mv cuda/lib64/* /usr/local/cuda/lib64/
sudo mv cuda/NVIDIA_SLA_cuDNN_Support.txt /usr/local/cuda/
Though really the third one is just for posterity's sake. There's no real reason to do that. Congrats! You have now installed cuDNN, and can deep-learn to your heart's content.